
Overview
By default, Init Live Search opens with an empty input or auto-triggers a slash command like /recent. But if you’d like to make a stronger first impression — an inviting, content-rich start screen — here’s how to customize it.
We’ll use the ils:modal-opened hook to detect when the modal is opened, then fetch data via REST APIs (categories, tags, recent posts) to display a dynamic welcome screen that helps users dive deeper into your content.
Available REST APIs
Init Live Search includes several ready-to-use endpoints — no backend code needed:
GET /initlise/v1/taxonomies?taxonomy=category– category listGET /initlise/v1/taxonomies?taxonomy=post_tag– popular tagsGET /initlise/v1/recent– latest posts
See the full endpoint list here: Init Live Search REST API Reference
Sample JavaScript
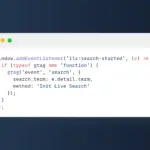
window.addEventListener('ils:modal-opened', async function () {
    const input = document.querySelector('#init-live-search-input');
    if (!input || input.value.trim()) return;

    const container = document.querySelector('.ils-results');
    container.innerHTML = '<p class="ils-loading">Loading suggestions...</p>';

    const [categories, tags, recent] = await Promise.all([
        fetch('/wp-json/initlise/v1/taxonomies?taxonomy=category').then(r => r.json()),
        fetch('/wp-json/initlise/v1/taxonomies?taxonomy=post_tag').then(r => r.json()),
        fetch('/wp-json/initlise/v1/recent').then(r => r.json()),
    ]);

    container.innerHTML = `
        <div class="ils-welcome">
            <h3>Popular Categories</h3>
            <ul>${categories.slice(0, 6).map(c => `<li><a href="${c.url}" target="_blank">${c.name}</a></li>`).join('')}</ul>

            <h3>Trending Tags</h3>
            <ul>${tags.slice(0, 6).map(t => `<li><a href="${t.url}" target="_blank">#${t.name}</a></li>`).join('')}</ul>

            <h3>Recent Posts</h3>
            <ul>${recent.slice(0, 5).map(p => `<li><a href="${p.url}" target="_blank">${p.title}</a></li>`).join('')}</ul>
        </div>
    `;
});
Lightweight CSS
.ils-welcome { padding: 1rem; line-height: 1.6; }
.ils-welcome h3 { margin-top: 1.5rem; }
.ils-welcome ul { list-style: none; padding-left: 0; display: flex; flex-wrap: wrap; gap: 0.5rem; }
.ils-welcome li { background: #f2f2f2; padding: 0.4rem 0.6rem; border-radius: 4px; }
Advanced Example: A Complete Welcome Interface with UIkit
To make the interface look smoother and more modern, you can take advantage of UIkit (if your site is already using it), combined with localStorage to cache results — avoiding repeated REST API calls every time the modal opens.
Here’s an optimized example:
- Use
uk-buttonanduk-border-pillto display popular categories and tags in an eye-catching way. - Display recent posts using
uk-list+uk-list-divider. - Automatically cache results in
localStoragewith the prefixils-cache-*, so you can easily clean them up later with the/clearcommand.
window.addEventListener('ils:modal-opened', async function () {
    const input = document.querySelector('#init-live-search-input');
    if (!input || input.value.trim()) return;

    const container = document.querySelector('.ils-results');
    container.innerHTML = '<div class="uk-text-center uk-padding"><div uk-spinner></div></div>';

    function getCache(key) {
        const raw = localStorage.getItem('ils-cache-' + key);
        try { return raw ? JSON.parse(raw) : null; } catch { return null; }
    }

    async function fetchAndCache(key, url) {
        const res = await fetch(url).then(r => r.json());
        localStorage.setItem('ils-cache-' + key, JSON.stringify(res));
        return res;
    }

    const [categories, tags, recent] = await Promise.all([
        getCache('categories') ?? fetchAndCache('categories', '/wp-json/initlise/v1/taxonomies?taxonomy=category'),
        getCache('tags') ?? fetchAndCache('tags', '/wp-json/initlise/v1/taxonomies?taxonomy=post_tag'),
        getCache('recent') ?? fetchAndCache('recent', '/wp-json/initlise/v1/recent'),
    ]);

    container.innerHTML = `
        <div class="uk-padding-small uk-container">
            <h4 class="uk-heading-line uk-h5 uk-text-bold uk-text-muted uk-text-uppercase">
                <span><span uk-icon="icon: folder"></span> Popular Topics</span>
            </h4>
            <div class="uk-flex uk-flex-wrap uk-margin-bottom uk-grid-small" uk-grid>
                ${categories.slice(0, 6).map(c => `
                    <div>
                        <a href="${c.url}" target="_blank" class="uk-button uk-button-default uk-button-small uk-border-pill">${c.name}</a>
                    </div>
                `).join('')}
            </div>

            <h4 class="uk-heading-line uk-h5 uk-text-bold uk-text-muted uk-text-uppercase">
                <span><span uk-icon="icon: tag"></span> Featured Tags</span>
            </h4>
            <div class="uk-flex uk-flex-wrap uk-margin-bottom uk-grid-small" uk-grid>
                ${tags.slice(0, 6).map(t => `
                    <div>
                        <a href="${t.url}" target="_blank" class="uk-button uk-button-text uk-border-pill">#${t.name}</a>
                    </div>
                `).join('')}
            </div>

            <h4 class="uk-heading-line uk-h5 uk-text-bold uk-text-muted uk-text-uppercase">
                <span><span uk-icon="icon: file-text"></span> Recent Posts</span>
            </h4>
            <ul class="uk-list uk-list-divider">
                ${recent.slice(0, 10).map(p => `
                    <li>
                        <a href="${p.url}" target="_blank" class="uk-link-heading">${p.title}</a>
                    </li>
                `).join('')}
            </ul>
        </div>
    `;
});
Tip: You can totally extend this section by adding a “View More” button, or directly link slash commands like /popular, /category wordpress… If you’re not using UIkit, just replace the corresponding classes — the logic stays exactly the same.
Why Fetch on Modal Open?
Fetching data only when the modal is opened offers several clear benefits:
- Resource efficiency: No need to preload data the user may never request.
- Context awareness: You only show the content once the user actively opens search.
- Performance: Keeps your page light and responsive.
This follows the principle of “Lazy Load on Intent” — respond only when the action is triggered, not before.
Optional Extensions
You can enhance the welcome screen with other REST APIs such as:
- WooCommerce products:
GET /initlise/v1/product - Posts by date:
GET /initlise/v1/date - Random or popular content:
GET /initlise/v1/random,/popular(if defined)
Each result can be linked directly or used to prefill a slash command — highly flexible, depending on your UI/UX strategy.


Admin
05/06/2025 lúc 16:11
This advanced snippet is actually the extended JS used on this very blog — open the search modal to see the live demo in action 👍